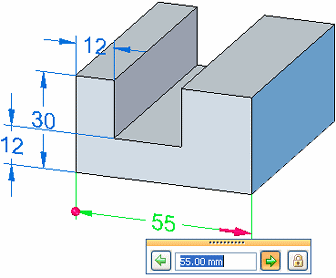
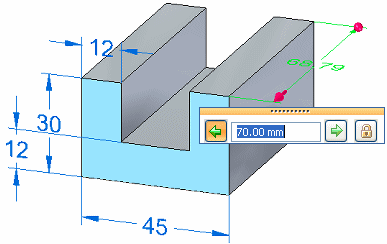
In synchronous models, you can directly edit the model using PMI dimensions.
Click the dimension text on the dimension that you want to change.
The dimension value edit handle is displayed.
Do one of the following:
(Resize the model in the direction indicated) Type a value in the Dimension Value Edit dialog box and press Enter.
(Flip the direction of the dimension edit) Do all of the following:
Type a value in the Dimension Value Edit dialog box.
Click the 3D arrow terminator to change the direction of edit, or click an arrow button on the dialog box.
Press Tab to apply the change and leave the value edit box open, or press Enter to apply and close it.
Tip:
If you have a mouse with a wheel, you can rotate the wheel to change the dimension value.
(Apply a dimension edit equally in both directions) Do all of the following:
Type a value in the Dimension Value Edit dialog box.
Click the symmetric arrow button on the dialog box.
Press Tab to apply the change and leave the value edit box open, or press Enter to apply and close it.
Example:
The dimensions on this model migrated from a sketch, and then were edited on the model.


(Optional) Add a dimension to an edge, and then edit the dimension value.
Example:
This dimension was added and edited.

Tip:
You can use the options on the Modify Dimension QuickBar to further control how the faces respond to the dimension edit.

Select logically connected faces to apply the dimension value change
Lock or unlock a PMI dimension to control what is changed directly and indirectly