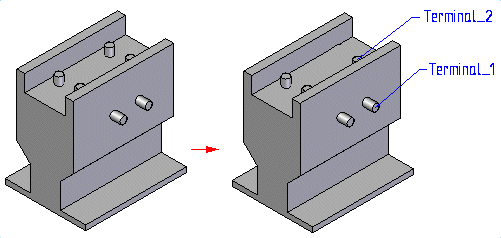
Displays the Assign Terminals dialog box, which allows you to specify a component name and makes terminal assignments to a part or sheet metal model. Once you make these assignments, you can include the information in a net list file that is used to automatically generate a harness design.
Assigning terminals consists of two steps:
Assigning a component name and terminal name.
Selecting a circular edge for the terminal.
When you click Assign Terminals, the Assign Terminals dialog box is displayed.
To assign a component name, type the name in the Component Name Field.
After assigning a component name, click New, and type a terminal name in the Name field. The terminal name is an attribute that is applied directly to geometry in the part file.
After assigning a terminal name, click the Status field for the terminal, then click Set, and then, in the graphic window click a circular edge you want to assign the terminal to. When you click the circular edge, a balloon containing the name of the terminal is connected to the center point of the circular edge.

A part can contain only one component, but a component can have multiple terminals.
To assign multiple terminals, click New and repeat the process for creating a terminal. Once you finish adding the terminals, click OK to finish the command.
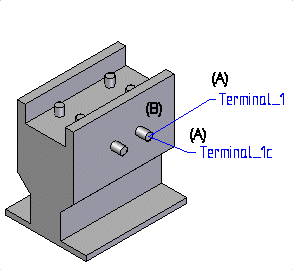
When assigning terminals, you can apply multiple terminals (A) to a single circular edge (B).

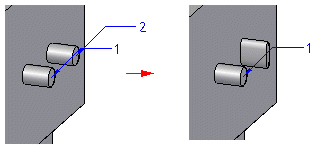
If the circular edge used to define the terminal is deleted or becomes elliptical on a recompute, the status of the terminal name in Assign Components dialog box becomes Not Set.

A terminal balloon is displayed only when you are working in the Assign Terminals command. When you click OK to finish the command, the balloon is automatically hidden. Like other 2-D objects, you can highlight, select, and edit the properties for the balloon.
You can highlight a balloon when the Set button on the Assign Terminals dialog box is disabled. You can also highlight a balloon that you want to edit if the Set button is enabled. However, you cannot highlight a balloon when attempting to set a terminal after you click the Set button. When you highlight a balloon in the graphic window, it is displayed in the Highlight color and the Assign Terminals dialog box displays a box around the row for the terminal.
When you select the balloon, it is displayed in the Select color and the Assign Terminals dialog box highlights the row for the terminal.
When you select a balloon, a command bar is displayed that allows you to edit the balloon. You can do such things as add or remove a leader and break lines to the balloon, add a prefix or suffix to the balloon, and change the text, shape and size of the balloon. If you change the text of the balloon, the terminal name on the dialog box is updated to reflect the change.
You cannot delete a balloon directly. If you want to delete the balloon, highlight the row on the Assign Terminals dialog box and click Delete. Be aware that this deletes the terminal attribute along with the balloon.